| |||||
|
Updated May 28, 2020
| |||||
| The Map Cursor | |||||
|
Every Calflora map application has a map cursor:
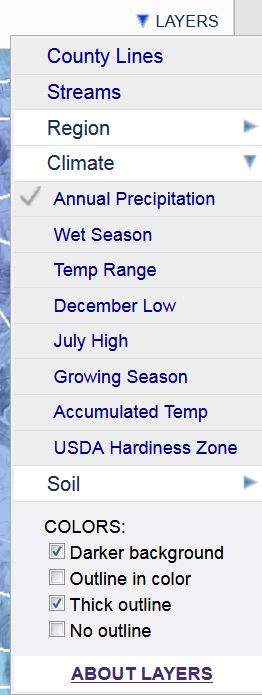
When you are using the map, you have a single location indicated on the map by the map cursor. Your location is displayed as latitude and longitude just outside the map. You can change your location by clicking (not dragging) on the map. You use the map cursor to find the coordinates of a spot on the map, or to extract information from the map. For instance, if you have the Annual Precipitation layer turned on, then when you click in a colored polygon, you will see the annual precipitation value at that location. In the following sequence of map clicks, the precipitation goes from 37 inches on the coast to 53 inches up in the hills: | |||||


Similarly, to find out the name of a park, turn on the Protected Areas layer and click inside the boundary of the park. (There are 25 layers available -- see About Map Layers.) You can also use the map cursor to go from one map application to another, preserving your location. Suppose you are in What Grows Here?, viewing a list of plants that grow at a particular location. To view all observations at the same location, open  TOOLS and click TOOLS and click

|
|||||
| Adding a Point Location in Plant Observation Entry | |||||
|
Here is how to add a point location to a new record
in Plant Observation Entry (POE).
|
|||||
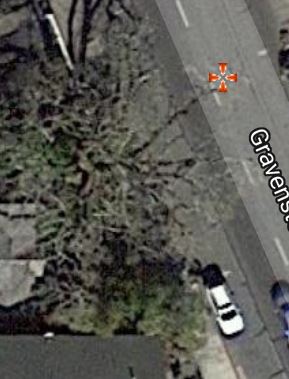
| On the map, zoom in close to where you want to put the point location. |
|
||||
|
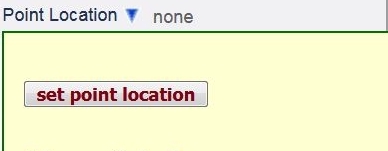
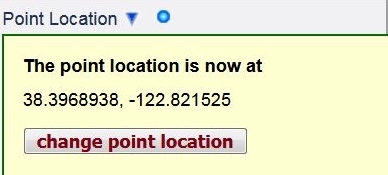
Open Point Location .
Click set point location.
|
|
||||
|
|||||
|
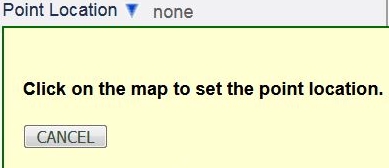
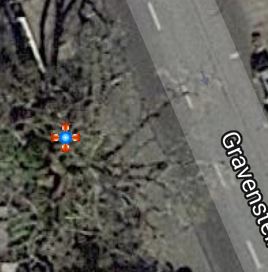
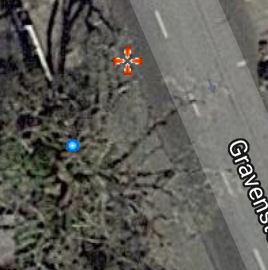
Click once on the map exactly where you want to put the point location.
A blue icon
|
|
||||
| The Point Location panel shows the latitude and longitude of the new location. |
|
||||
|
This observation record now has a point location.
You can move the map cursor by clicking on the map. The blue icon stays in the same place. |
|
||||
|
If you need to change the point location, press |
|
||||
| Drawing a Polygon | |||||
|
When drawing a polygon, it is important to keep the sequence of vertices in mind. When you are first drawing a polygon, you enter the vertices in order. When you are editing a polygon that has already been drawn, you can add additional vertices in between the existing verrtices -- when you click on the map, the new vertex is inserted in between the two closest existing vertices. If you need to draw a complicated polygon, the best strategy is to 1. enter a simple outline with few vertices in the first pass, and 2. edit the polygon to fill in details in subsequent passes. Here is an example. | |||||
|
Press and enter vertex #1.
The first vertex displays as a white diamond. |

| ||||
|
vertex #2
Vertices after the first display as yellow squares. | 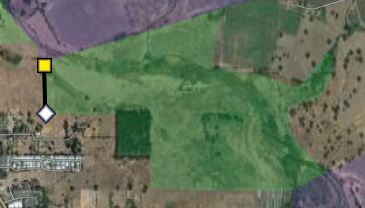 | ||||
|
vertex #3
As soon as there are three vertices, the software draws lines between them. The last vertex connects to the first vertex. | 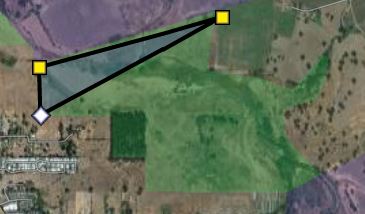 | ||||
| vertex #4 | 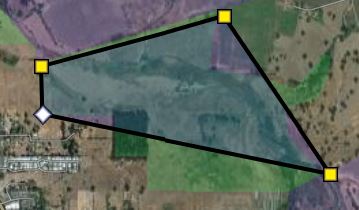 | ||||
| vertex #5 | 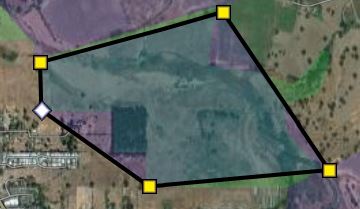 | ||||
| Press . This is the polygon so far. | 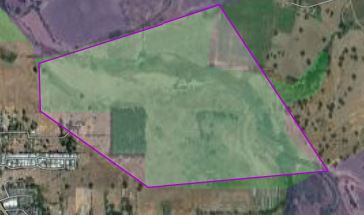 | ||||
|
Press to fill in the detail.
Click between two existing vertices to add a new vertex. | 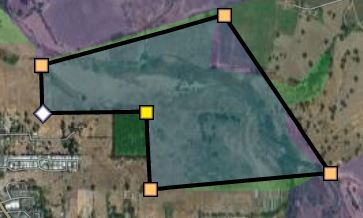 | ||||
| vertex #6 | |||||
| vertex #7 | 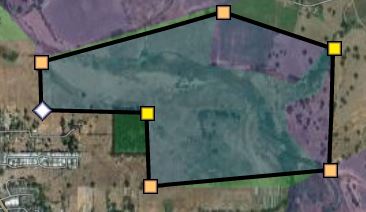 | ||||
| The user is trying to add a vertex between vertices #3 and #7, but instead it gets inserted between vertices #1 and #2. This is not right. The user clicks on it to get rid of it. |  | ||||
| Trying again to enter vertex #8, the user clicks in a place that is closer to vertices #3 and #7 than to any other vertices... | 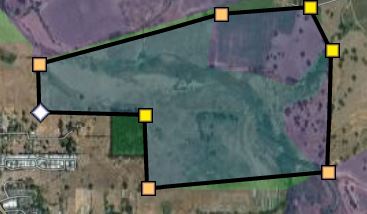 | ||||
| and then drags vertex #8 to where it belongs: | 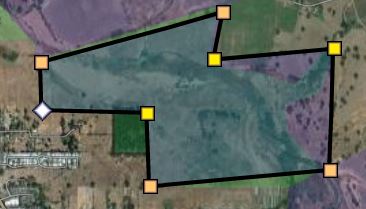 | ||||
| After adding six more vertices: | 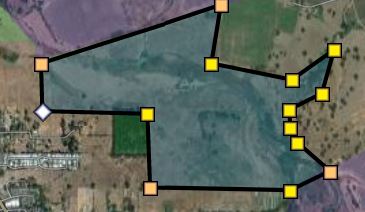 | ||||
| Press . This is the final polygon. | 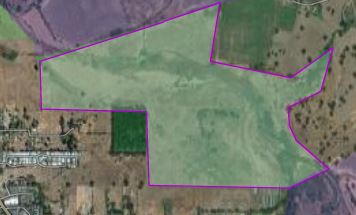 | ||||
| More Information | |||||
|
About Map Layers Plant Observation Entry Help |
|
||||
 appears where you clicked.
The map cursor is also at the same location, and appears under the blue icon.
appears where you clicked.
The map cursor is also at the same location, and appears under the blue icon.